In this article I will explain the different types of airbrushes that are out on the market today and help guide the beginner to choose what is best for them. As we go on through the list, the quality of airbrushes will aid you in becoming a higher quality fish painter. Keep in mind that just because it’s cheap or a top of the line airbrush doesn’t insure you of a quality paint job.
There are two kinds of airbrushes out there for the taxidermists. You have a single action and a double action airbrush. The single action works simply on the method of just pressing down a trigger located on top of the airbrush and then will have a paint flow nozzle in front of the airbrush, or others can have a wheel located on the back of the air brush for paint flow. These airbrushes are fairly cheap and a good all around beginner airbrush.
Single action airbrushes come in three tip sizes ranging from 1-3 and 5 or different colors. What this means is how fine the paint flows from each tip. The 1 or tan tip does the fine detail work on the fish. This is generally for paint that is thinned and stained for smooth detail work, like doing the fine dots on a rainbow. The 3 or the grey tip is a medium flow and known as the general-purpose tip. It will do from fine detail to broad spraying. Number 5 or the blue tip is known for heaver paints that haven’t been stained or thinned down. You can generally use it right from the bottle.
The next kind is a double action. The double action works in two ways. One it has a trigger that you press down to let airflow through the brush in which, two, the trigger is pulled back to let paint flow through the nozzle. The more the trigger is pulled back the broader the paint flow becomes. These airbrushes are mainly used in all kinds of work, from model making to automotive along with high graphics.
Now on a single action airbrush you’ll only find what they call a siphon fed. What this means is that air and paint are mixed together simultaneously with the nozzle being the main control on paint flow.
On a double action brush you have three choices to choose from. One is siphon fed just like the single action. You can also find in them side fed. They usually have a smaller cup on the side but do have larger ones for more paint and can be interchangeable from left side to right side. The last is gravity fed. The paint is dropped into a small cup on top of the airbrush. This is the best choice for doing all detail work. You can use small amounts of paint and control air pressure better. Because it's gravity fed it lets the paint flow right into the airbrush to where the user uses smaller amounts of air pressure to work with.
Prices for single action runs from $35.00 for cheap but something to get a person started in, and go up to $60.00 for a little better one.
Double action can vary greatly in price. This will depend on what quality you want in an airbrush. Also remember just because you buy a top line airbrush doesn’t mean you can paint like a person who is experienced in them. It takes a lot of control to get extreme detail with these. A double action will start off around $80.00 and range into over $500.00 for higher quality airbrushes. There are more expensive ones but they're not used in taxidermy. These are used with inks and dyes, which are not normally used in this business. On the straight and narrow, the one I have costs $175.00 and does practically all my fish work. It’s only when doing extreme detail work for competition work will I use my other one that runs around $300.00. Trust me and don’t spend more than $200.00 for any airbrush if you're looking into one that will handle all types of taxidermy work and do quality.
You can find almost any airbrush in taxidermy catalogs or go to any art store and find many different types of them there. Besides the taxidermy industry or art stores, if you look on-line by just typing in airbrushes you’ll find different sites that can carry the same airbrushes for a lower price. So before you buy look into all the aspects of an airbrush and don’t be afraid to buy a book on how they work and what you do with an airbrush.
Along with your purchase of an airbrush you have to make sure you have the right equipment to use them. You will need an air compressor that produces a minimum of airflow at or above .64cfm (18 lpm). The costs of an air compressor range from $120.00 to and over $1000.00. You can get an air compressor right from the manufactures that run very quiet but most can’t run all day long with out running into some types of problems. If you have room in your studio and don’t mind the noise, I suggest you buy one that contractors use for air gun work. They’re made to work all day long with very little maintenance. A good air compressor will run you around $200.00.
When you get an air compressor, you should buy, and it’s recommended that you also install a moisture trap so no excess water gets into your air hose line. Having water in the air-line will cause you many problems with your paint, whether you use water-base or lacquers. They cost from $30.00 to $150.00. For most or all of our taxidermy work a $30.00 moisture trap will work just fine.
One extra to buy with an airbrush is a holder. Being that there are so many out on the market and cost can vary any person using 10-gauge wire can bend one and save a few dollars. If you so choose to buy one expect to pay from $16.00 to $25.00.
If you’re not real sure on what to buy as what you may need just buy a starter kit. They will contain all necessary components to work an airbrush. Costs will vary depending on the manufacture and what kind of airbrush you want so expect to pay from $300.00 to $1500.00 or more.
Now that we pretty much covered on what’s needed to start running an air brush we need paint.
With so many different types of paint companies out there what should I choose to use and what colors are best to buy?
First your best bet is to go with a kit of colors. If you like doing warm water fish buy a kit for them (bass, pike sunfish etc), likewise for cold-water fish (trout salmon etc).
From there I would then buy paint in colors that you may need. Don’t ever buy all the paint a manufacturer has, you’ll never use every color they carry and if you do need a special paint buy it in the 1oz. container. The cost of kits generally run around $40.00. This is basic but it does have what you need to get started.
Paints come in a variety of choices.
You have transparent , which will show you under lying colors and can bleed through other opaque colors.
Opaque, which cover other paints and do not bleed through under lying colors.
Metallic paint that are usually applied first to help give you a brilliant life like color to your fish.
Pearlescent colors are used at any time to give that pearl look many fish have.
Now should I use lacquer or water-base paints?
Both have pros and cons. Lacquers are very nice to work with. They thin very easy with lacquer thinners and you slow the process of tip drying with the use of retarders. The colors in lacquers are more brilliant and vibrant than most water-base paints. You can say that they're very easy to use from a beginner point of view, but health reasons alone, you should try to stay away from them. The only way I would ever suggest you buy any lacquer paint or gloss is to make sure you wear a proper respirator and have an air booth to spray in. Air booths are very expensive and can run into the thousands for a proper spray booth. Plus the uses of lacquers are very hazardous.
Next are water-base paints. The main problem with water-base paints is tip clogging or paint build up on the tip of your airbrush. They are a bit harder to use, but once you learn on how to thin your paints with the use of alcohol, water, and retarder, you’ll find that they’re very friendly and nice to work with. Thinning your paints should be done 75% of the time. The mix I generally use, and it’s only a base, is to use 70% paint mixed with 28% alcohol and 2% retarder. This is just a quick base to work with. As you progress in painting you’ll be able to mix transparent base with regular opaque paints to achieve different depths in your fish painting.
Are water-base paints hazardous to use?
No, but there still are risks and precautions for you to take. You should have a dust mask on. While spraying the paint, you’ll encounter air borne paint that can enter the lungs and cause health problems even though they’re safe to use. So wear a dust mask at all times and if possible the use of a draw fan is very useful to get rid of the air borne particles. It’s the only major health problem from water-base paint.
What should I use to clean my airbrush?
That depends on whether you use water-base paints or lacquer. If you are using lacquers the product most commonly used is lacquer thinner. To fully clean an airbrush it needs to be soaked in a solution that loosens up old dried up paint. You can find them at any local hardware stores.
As for water base paints, I like and though I’m not advocating any products here, Windex is one of the best cleaners to use to clean out your airbrush before you use a different color. Other than that you’ll find many airbrush cleaners at any art store or plain warm water and liquid soap.
The finish of the fish is next. What type of gloss do I buy?
That depends on your personal choice. Do you or your clients like a high gloss or wet looking fish? Then you’ll need a gloss that does this. You can buy a high gloss from most taxidermy catalogs. Look for competition glosses, triple thick or high build up.
Some of these products can be purchased from any generic hardware store. Then you have just a regular gloss that looks shiny but not over powering where the fish looks wet but not a heavy looking gloss. There are many other glosses that taxidermy catalogs sell, or again you can find them on any shelf in most hardware and art stores.
Most of the glosses come in an aerosol can. Be careful when you apply any gloss from a can. They can contain small amounts of acetone, which can ruin a paint job in a matter of seconds. Acetone is very harmful to health besides what it can do to paint. So when applying any gloss either from a gloss gun or an aerosol can, put a flash coat on first. A flash coat is where you apply the gloss very lightly on the fish. Layer three or four times and make sure it’s dry prior to applying the next flash coat. After the gloss has set you can then layer the gloss on heaver. Again I’ll stress build up your gloss.
So what can I expect to pay for all of this?
Again price will vary but here’s a rough estimate to get started as cheaply as you can.
Airbrush kit: includes an air compressor, hose, moisture trap and a quality airbrush. $300.00
Now you’ll need paint: Starter kit, $40.00
Basecoat sealer: 8oz. $6.00
Starter kit of paints $40.00
Alcohol pint $1.00
Retarder 1oz. $2.50
Cleaner 4oz. $4.60
Clear coat or gloss $6.00
Total without tax is $400.10
Air Brush Guide For The Fish Taxidermist
By Frank E. Kotula
Ph. 1-570-819-0391
1011 Spruce St.
Wilkes-Barre, Pennsylvania 18702-7634
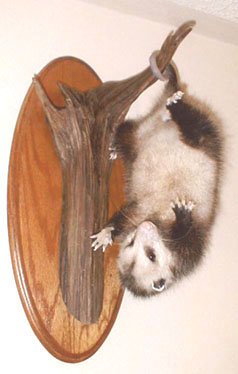
AWESOME 'POSSUM!
Hey, Yall's, ain't that the purdiest 'possum you ever did seed?
Just when you thought Frank was a fish guy, his image is shattered with a photo. Frank IS a TAXIDERMIST!
If you want to see pictures of his work in keeping with his Fish Guy image, click here. here
WHITETAIL DESIGNER SYSTEMS, INC.
Has made another expansion! Web site services for taxidermists are now available!