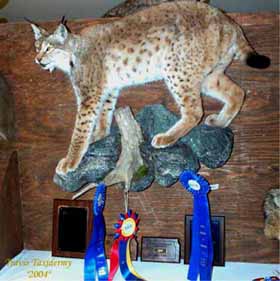
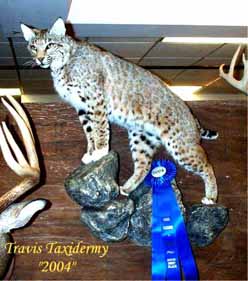
In this article I will cover two ways of skinning a bobcat/lynx for the purpose of Taxidermy. As we all know, there is more than one way to skin a cat, but the two basic, and best ways, are the ventral incision and dorsal incision.
The ventral incision: The ventral incision is by far the best incision for competition bobcat or lynx mounts, or to achieve the highest quality mount.
I start with the bobcat lying on his back, and start my incision about 2 inches in front of the armpits in the center of the chest.
Always use a scalpel blade, which is razor sharp, so you`ll achieve a nice clean cut. Continue the cut down to the anus (cutting around the sex organs), and stop your cut about two inches onto the bottom of the tail. Now make a 3/8`s inch incision on the very tip (bottom side) of the tail so the tanning liquids will be able to flow through the tail.
The ventral is the only incision which is required to prepare this bobcat for taxidermy, but it does create a little more work when the mounting process begins, because there are no incisions on the legs to allow you to slide the skin onto the manikin without removing the head, and two legs of the mannikin.
For a beginner, the easiest skinning process will be the dorsal incision, in which you can just slide the mannikin down into the skin, less the head of course. Now back to the skinning…
After the main incision is complete, move up to one of the front legs, and start working the skin back towards the spine as far as you can. Then start inverting the front leg skin. Grab the paw and push it down towards the chest. Keep separating the skin from the leg until you have the skin removed around the whole leg leaving the forearm and paws to skin later. Take a bone saw and cut through the leg and continue to free the skin from the carcass up to the spinal area.
Now work your way towards the hind leg, separating the skin from the carcass. Once again, grab the paw and push the leg towards the belly of the bobcat, and keep working the skin around the leg until enough skin is separated from the carcass to make a safe cut with the bone saw.
Now that the leg is free, pull the skin back towards the spine, and continue to free the pelt from the carcass. Now return to the tail area, and continue to separate the skin from the tail up to the spot where you stopped your initial incision. Free the tail completely up to this point. You will have to skin some of the opposite rear leg and sex organs to achieve this.
Once the skin is free from the tail, grab the two inch portion of the tail and pull the rest of the tail bone out ( a tail puller or pliers will make this job easier, just use caution so you don`t damage the tail).
Once the tail is free, flip the cat over onto the side that you skinned already. Continue skinning the skin off the rear leg down to the ankle. Cut the leg off at this point and keep working to free the skin towards the front leg.
Skin the front leg down to his wrist, and cut through his upper leg with the bone saw. Now skin your way to the neck area, where you first started your incision.
At this point, you should record your eye to nose measurement if you haven`t already.
Before we skin any further, let's make some cuts inside the mouth, to make sure we have enough lip skin for tucking later.
Take a scalpel, and make a slice along the gumline. Just below the teeth, you`ll see where the base of the tooth protrudes through the gums. This is where I make my cut.
I start in the rear of the mouth, and work forward on the lower jaw. After I have made this cut, I start at the front of the lower lip and skin the whole lower jaw area back to the corner of the mouth so that the skin is free from the carcass. I then go to the upper jaw and make the same slice along the gums like the lower jaw. I don`t skin the upper jaw any further at this point.
Now, return to the neck area, and pull the skin over the skull. Grab the skin like a rope, just in front of the nose, and keep pressure on the skin as you work the skin toward the nose.
The ear butts on a bobcat are located on the back of the skull, so use caution in this area. Stick your hand up inside the skin and put your index finger inside the ear butt for reference. Make your cut at the very base of the ear. You`ll have to cut fairly deep through the muscle to reach the earbutt. Once you have made this cut, pull forward with your index finger and keep skinning the ear forward. Now skin the opposite ear in the same fashion. Once both ears are cut at the butts, keep skinning forward, towards the eye.
Here again you should place your finger inside the eyelid, and pull forward as you skin. You will feel the eyelid with your finger so you`ll know where “NOT” to cut. Slice through the membrane on the back of the eye, and work with caution until the skin around the eye is free from the carcass.
Now move your finger down into the corner of his mouth, behind his actual lip, and pull out and forward. Slowly cut through the back of the membrane until you can see inside his mouth.
At this point look for the slice you made inside his mouth, and cut along this point until you get about halfway to his nose, then flip the bobcat over and skin the other eye and mouth area as you did before.
Your lower jaw skin should now be free from the carcass, so continue freeing the skin along the upper jaw line until you get to the nose area.
You will see the cartilage of the nose as you work forward. Make a cut down through the cartilage and remove the skin down to the lip.
At this point take your length and circumference measurements off the skinned carcass.
Now it`s time to finish skinning the legs and feet. Take a paper towel and wrap around the leg of the carcass and pull the leg away from the paw.
Continue skinning the leg down to the foot pads. Keep skinning through the foot pads until you reach the toe digits. On the front paw you will have to cut the dew claw off before you reach the foot pad. A good pair of dikes is handy for cutting the claw from the last digit joint.
Skin the two outside toes first, clear to where the claw hooks to the last digit joint, then use the dikes and free the claw. The skin on the hind feet will be fairly tight as you work your way down to the paw. Just take your time and it will invert like the front feet.
Now that the bobcat is completely skinned from the carcass, we can prepare to turn the ears, and split the lips and split the eyelids in preparation for salting.
I personally use “box blades” for my detail work around the eyes and lips. Starting with the lips, just above the whisker area, pull the lip back with your thumb as you split the lips. Keep separating the lip until you`ve completely split it to the very edge.
For the eyes, I place my index finger inside the eye and use my thumb to keep pressure on the skin as I start cutting. Keep splitting the eyelid until you see faint yellow eyelash butts. Getting fast at splitting eyes and lips takes time and experience, so just be patient and take your time.
Turning the ears is basically the same principle. I put my fingers inside the ear, and use my thumb to help separate the skin from the cartilage. Keep working the skin away from the cartilage until you're to the very edge, and tip of the ear.
The nose is fairly simple. Put pressure under the nose with your index finger and cut down through the center of the cartilage until it opens up completely. Then pull the cartilage back with your thumb and keep separating it from the nose pad. I pretty much leave the nose just like this until the tanning process is complete.
In another article, I`ll cover the final details of skin preparation prior to mounting the bobcat.
At this point I flesh as much fat and red meat off the pelt as I can. I also use a fleshing horn to clean the excess meat off the anal area. I then use non-iodized salt and cover the fleshside of the skin with about a half inch of salt. I rub the salt in the lips, eyes, and ear location and then cover the head in salt.
Don`t forget to salt the inside of the tail where we didn`t make the incision. I use a Q-tip with the cotton cut off one end to push the salt down into the tail. Don`t pack the salt in the tail, just work the Q-tip back and forth until you see salt coming out the end of the tail.
Leave the skin salted overnight, then shake off the salt and re-salt for another 12 hours. After the second salting, hang the skin to dry in a low humidity environment until it is dry.
The dorsal incision: The dorsal incision is probably the most popular choice for most taxidermists. I personally use the dorsal incision on bobcats which don`t have distinct markings running down the center of their backs.
The cut starts just below the skull, and continues down the center of the back until you reach the tail. You will have to continue to cut onto the tail for about an inch so you can remove the tailbone, and don`t forget to put a 3/8`s inch slice on the end of the tail (bottom side) for the tanning liquids to pass through the tail.
The rest of the skinning is basically covered under the “ventral incision”. The feet, and facial features are the same as stated above.