Detachable or Removable Antler Techniques for Antlered Big Game such as Moose, Elk, and Caribou

Personally, I have found out through trial and error that none of those detachable antler kits works for me. They are junk because you have too many things that can go wrong, like excessive drilling to make adjustments and the use of unnecessary apoxies or bondo which creates another mess. My method alleviates all this unnecessary work and mis-alignments.
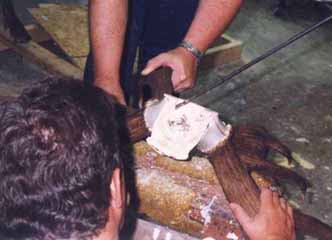
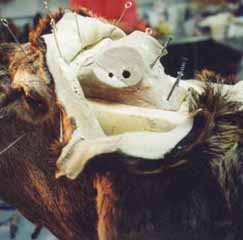
I have done many detachable antlers and the simplest way that I have found out is to turn the antlers upside down and just drill two holes from underneath the skull plate upward into each antler. The first hole will be drilled with a 1/2 inch extended drill bit and the second hole using a 3/8 inch extended drill bit. Drill up into the antler as far as you can without exiting the antler, like six to eight inches if possible. Make sure you take your time and get the correct angle downward into the antler.
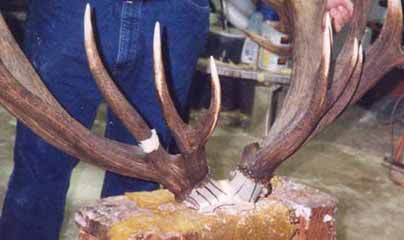
Once you have the holes drilled, make alignment markers with a magic marker all the way around underneath the burr of each antler. Now, I drill what I call a key hole using a 1/8" bit starting at the top of the crown in the back portion of the antler. Drill down about 2" or so into the back of the antler. Using a small nail or rod to put into this hole will take out any wiggle that may come into play when you re-attach the antlers. Then cut the antlers off just under the crown of the antlers.
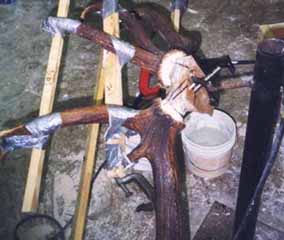
Now, you know they have to align up properly because they were solid before you cut them off. Now use stainless steel rods, one 1/2" and the other 3/8" and re-attach or pre-fit the antlers back to their original position. The benefit of using stainless steel rods is paramount because they don't rust. Those other types of square steel stock will rust over time and you can't pull the antlers off and sometimes bleed out with rust and run down onto the mount and create a real mess. Of course, this all depends on where the customer places the mount in his home, like in a damp basement etc.
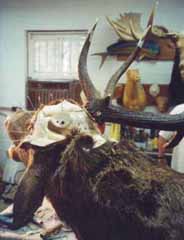
On the under side now you will cut those stainless steel rods off or you can cut out a place in the head board to accommodate the extra length in the rods. That's usually softer because most supplier's use plywood for their headboard. I then score those rods on the underside with a sander so that they will be rough and for something to hold to. I use fiberglass on my under head area because it seems to hold much better than bondo.
I've found out that if you take you're time this will be an easy way to do detachable antlers. Your second job will be easier than the first and your third job will be a breeze because now you have confidence in what you're doing.
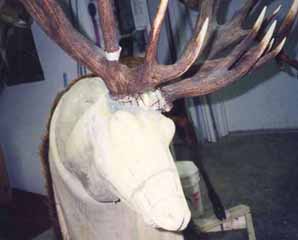
The last thing you will need to do is to put that key hole rod back in it's proper place. I leave it protruding out about 1/8 inch or so because I might want to take a pair of pliers later on and grab it so that I can pull it out. Don't forget to paint it a similar color as you antlers and it will never be noticed by anyone.
Good Luck
John Griffith
WHITETAIL DESIGNER SYSTEMS, INC.
Has made another expansion! Web site services for taxidermists are now available!