Beginning Duck Taxidermy Basics
Waterfowl Specialist
Dane Bisel
Beaks-N-Bills Taxidermy Studio
Logan, Ohio
Many people are intimidated by the sheer thought of working with ducks but by using a few guidelines and following these basic steps duck taxidermy can be a snap.
Choosing your bird:
Obviously this category only applies if you are fortunate enough to actually choose the duck you wish to work on.
Plummage:
The first and foremost thing I look for is good plumage. Plumage is the feather covering of ducks. Ducks in full plumage (often referred to as breeding plumage) generally have fully developed feathers and overall are easier to make look right. Ducks harvested early in the fall (September and October) are usually full of pin feathers (not fully developed feathers) and these can be a real hassle to work with. The specimen will probably lose most of the pin feathers by the time the fleshing, washing and drying process is complete thus making the mount look “choppy” and not smooth.
Overall condition of specimen:
Look at the overall condition of the duck. Is the duck missing feathers (pulled out by dog, carried by neck, etc)? Are all of the wing feathers in tact? Tail feathers missing (very common on late season divers…especially stiff tailed ducks)? Try and pick a duck that looks good “in your hand”. A lot of people prefer to retrieve their ducks by hand versus using a retrieving dog…I am one of them. Unless you have a dog with a very soft mouth, damage can be done.
Wings:
The wings of the duck are important in different ways. It all depends on whether the duck is going to be done flying or sitting. On a sitting duck the overall condition of the wings is not nearly as important as that of a flying duck unless you are going to have a wing partially exposed in the final position of the duck. On a flying duck you want to look for a duck with wings that are not broken ( humerus, radius and ulna bones can be repaired but the bone in the end of the wing are hard to repair). We will get into repairing broken wings at a later time.
Feet:
Feet are an important part of any mount. In a lot of cases they make or break it. When choosing a duck make sure there are no holes in the main portion of the foot or leg. These can be hard to repair later down the road when injecting the feet (we will also touch base on this later).
Freezing the duck:
After the duck is harvested it is important that you (or your customer) get that bird in the freezer as soon as possible, especially if you live in a warm climate. If there is noticeable amounts of blood on the duck then I suggest rinsing it off using cold tap water. Pay particularly close attention to areas of the duck that are white. These areas will come clean when the duck is washed after fleshing though. This is more of a safety precaution.
When the duck is clean and ready for the freezer than you have a couple different options. The first (which I prefer) is to take an old pair of pantyhose (use the leg) and drop the duck in head first. This helps to keep the feathers going the correct way and eliminates the possibility of breaking a head off in the freezer. The second way is to take the duck's head and place it under one of the wings. Wrap the bird in newspaper and tape up the paper. After your duck is prepared for the freezer, drop it in a sealed plastic bag so it is airtight. If you expect the duck to be in the freezer for an extended period of time (over 1 year) I suggest dampening a paper towel and wrapping it around each individual foot to help prevent freezer burn.
Skinning the duck:
The first initial cut on a duck is made with the bird laying on it back. Find the breastbone of the duck by pushing down on the chest area. You will feel a bone in the center of the duck that runs from the neck attachment point to between where the legs meet the body. Insert your knife (I use a razor blade) into the duck about an inch down the breast from where the neck meets the body. Do not make slicing motions with your blade. Make sure it is sharp and just run it right along the breastbone on either side. Do not remove your knife while cutting. If you keep the knife inserted and handle vertical it will help part feathers instead of cut them. Cut all the way to the anus or “vent” and cut through the front side. This will prevent the skin from tearing while completing the skinning.
Start skinning the duck on either side of the breast incision. You can usually use your fingers to “pry” the skin away from the body near the breast area.
Skin around the tail. Make sure that you leave the tail quills in tact.
Once you have the tail freed up continue skinning down to the legs. Once you reach the legs, skin around them to the knee. Cut off at the knee with a pair of wire cutters or a sharp pair of shears.
Continue skinning up to the base of the wings. Once you reach the wing area cut the wing at the shoulder or where it meets the body. It is better to cut a little too much meat than cut a hole in the skin at this point.
Skin up around the tips of the breast and into the crop area of the duck. Be careful here. There is usually a lot of fat. You should have the esophagus, trachea and neck skinned around at this point.
If you have a duck that will allow for the head to be “inverted” or turned inside out then continue to skin up to the bill. Pay particularly close attention to the ears and the eyes. Stay close to the skull and take your time. Some of the ducks that can be inverted are wood ducks, hooded mergansers, harlequin, ruddy to name a few. If you can not invert the head than cut the neck off of the duck now where it meets the body. You will need it later to determine length when putting neck back in. If you inverted the head than cut the neck off where it meets the skull.
Leg and Wings skinning:
Now you should have a duck with no body in it. The wings, legs and head are still in tact. I like to start with the legs. I hang the bird by the drumstick of the leg and skin down to the knee joint. Remove all meat from the bone as well as just the ball of the femur.
Turn the legs back right side out so the skin does not dry out.
Next I do the same thing with the wings. This can get a little tricky so as with everything else…..go slow and be deliberate with your cutting. Better to take too little than too much leaving a hole. Hang the wing by the end you severed from the shoulder.
Continue to skin down to the first joint. This is where it gets tricky. On a standing duck you can stop here and remove meets thus leaving the secondary feathers attached to the bone. If doing a flying duck you have to skin this area out. On the back side of the radius and ulna the secondaries attach to the bone. You will need to cut these off of the bone. Keep the razor right next to the bone and cut one feather butt at a time skinning the rest of the wing as you go. Do this until you reach the next joint. Do not put a lot of force on this area or it will tear. Remove all the meat but leave the tendon in tact that connects the humerus to the radius and ulna.
Now you have the head left to do. If you inverted the head then just remove the eyes, meat, and cut off the very back of the skull to allow you to remove the brains. If you did not invert the head or plan to use an artificial head then take a sharp blade and cut at the feather line where it meets the bill (cut from the outside of the head). Continue to skin back until you reach the eyes. Be careful….yes, go slow! This is not the place for air holes! Keep the blade close to the skull. Once you cut through the first part of the eye and expose the eyeball you will understand exactly “where you are”. It can be difficult to know exactly where you're cutting prior to exposing the eyeball.
Next will be the ear canal. Stay close to the skull when skinning this area out. You should only have a bb size hole for the ear. Continue to skin out till you reach the area on the neck where you left off when skinning the neck out. The head and neck should pull right out now. Throw this in a bag and place it in the freezer. This will come in handy later when you get ready to put the bird together.
Once you get a few ducks under your belt you will have no problem skinning them out. The first couple will probably be a little frustrating but you will learn and get better as you go. Try to start with a thicker skinned duck and stay away from thin skinned birds at first (dove, woodcock, teal). Keep your chin up and stay positive. If you cut a hole then no big deal. That is the nice thing about feathers…..they hide a lot!
I will be writing more on fleshing, washing and mounting of birds so stay tuned and good luck.
Dane Bisel
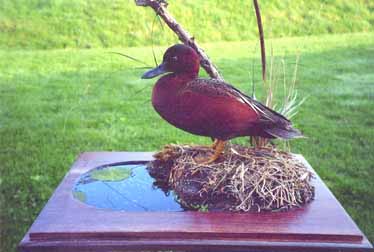
Cinnamon Teal Taxidermy by
Dane Bisel
Ph. 1-740-385-0826
Beaks-N-Bills Taxidermy Studio
Logan, Ohio
Hide Tanning and Taxidermy is sponsored by
WHITETAIL DESIGNER SYSTEMS, INC.
Has made another expansion! Web site services for taxidermists are now available!