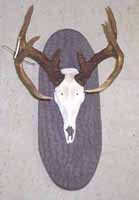
Clean skulls for use as European/Euro Mounts, Western Mounts, study skulls, or collector's items.
Skulls can be cleaned in many different ways. There are a couple of methods which are more accepted than others, but there is not one single method which I would consider to be the absolute best for cleaning skulls. Four methods seem to be the most common used and proven ones.
Skull Cleaning with Beetles or Bugs:
If you are using beetles to clean your skull, I would recommend that you first skin the skull and remove as much meat as possible. Remove the eyeballs, tongue and any tissue that you can easily cut off with a sharp knife or blade. If you just dump the whole skull "as is" into the terrarium with the beetles you may end up with a half cleaned skull. Even dermestid beetles have a limit on how much they can consume.
If the skull is a fresh one, just lay it in the cage after you are done cutting off the biggest pieces of meat. Make sure you keep your beetles in a dark enclosure with a high humidity. They like dark moist places.
If the skull was already on the drier side when you got it, rewet it by soaking it in water for about an hour. Keep misting the skulls you put into the beetle cage on a daily basis to keep them from drying out while the beetles consume the flesh. They will quit eating if the skull gets too dry. Do not overmist though, or you might cause mold to grow in the terrarium.
It helps if you have more than one tank of beetles so you can switch tanks if the beetles in one tank have eaten their share and the skull is still not clean. This process can take anywhere from a couple of days to several weeks depending on the size of the skull, the appetite of your beetles, and the freshness of the meat.
Once the skull is cleaned of any meat and tissue, take it out of the tank and rinse it real good under running water and brush with a soft wirebrush. If any brain is left in the brain cavity, it needs to be taken out with a small wirehook. The cartilage in the nose cavity needs to be taken out, but not the small nasal bones. Leave them in.
Place the skull in the sun for a few days to dry. Once the skull has been dried for a few days in the sun, it is ready for the bleaching process. Some people skip this process. It all depends on how white you want your skull to look. If you are going for a more off white natural look, don't bleach it. If you want your skull gleaming white, go ahead with the next step.
Place the skull in a container (can't be metal) of hydrogen peroxide. You can purchase this at beauty supply stores at 40% volume, or at grocery stores, drug stores or chain stores at 3% volume . The strength of the peroxide will determine on how long you will have to leave the skull in the solution. If you use the 40% volume, leave the skull in it no more than about 12 hours (overnight). If you use the 3% volume, it may have to be in there for a couple of days. Make sure that you cover, or put a lid on the container with the bleach so it will work properly.
After the bleaching process, take the skull out and let it sit in the sun again for several days to dry. Once it is dry, glue any loose teeth or missing teeth back in with Elmer's glue. It dries clear and can not be seen once it has dried.
Now you may want to spray your skull with a slight mist of Deft matte wood finish or just leave it as it is. I found that if I spray my skulls with a finish afterwards, they stay clean longer, and they are easier to keep clean later on down the road.
The beetles method comes in real handy if you live somewhere where you have a lot of neighbors which would be bothered by the smell of rotten meat, which brings us to method number 2.
Skull Cleaning by Maceration:
I personally like this method the best. The damage to the skull is minimal or nonexistent with this method if it is done correctly.
Skin the skull and remove the biggest parts of flesh on it just as in the above method. Then take the skull and put it in a tub or bucket of water. Make sure the whole skull is immersed in the water. No need to add anything to the water even though I have heard of people adding beer and baking soda to it to speed up the bacteria
growth. If you live in warmer climates where the temperature does not drop below freezing, this is not all that necessary. The warm weather and the sun will stimulate the growth of bacteria in the water, and they will start to eat away on the tissue.
Depending on your outside temperature and the time of year this process can take from as little as a week to a couple of months. If you need to, you can place an aquarium heater in the bucket with your skull to keep the water warm. The water needs to be checked every three or four days, and if necessary partially replaced with fresh water. If the water gets too murky and nasty with meat tissue floating around in it, it needs to be changed out. Don't exchange all of the water as you want to keep the bacteria in the water. Always leave some of the old water in the container.
You know that the skull is ready to come out when you can easily remove the meat with your hands. It will literally just fall off and very little, if any, scraping with a knife will be required.
Take the skull out of the water. Rinse it off with clean water and scrub it with a soft wirebrush to remove the last bits of tissue which may cling to the skull. Also make sure you rinse the brain out, which at this point should be very soft and runny. Clean the skull under running water inside and out and then let it sit in the sun for a few days to dry.
If any teeth are loose or missing (you may have to search the bucket in which the skull was in before dumping it out), rinse them off with clean water as well and put in a container for later installment back into the skull. Then follow the steps of bleaching and finishing as explained in the beetles method. The maceration method is ideal if you live out in the country with no, or hardly any neighbors, and in warmer climates where it does not get very cold during the winter.
Skull Cleaning by Simmering Method:
Another method commonly used is to simmer (not boil) the skulls. Skin the skull and cut off the biggest chunks of meat as described above. You can then either soak the skull for a week or so in a bucket of water to soften up the tissue (which is preferred), or go ahead and simmer it in a pot with water and sal soda (sodium carbonate), or baking soda (sodium bicarbonate) works well too.
Never boil a skull as this can do some serious damage to the bones. Just simmer the skull in the brew until the meat comes off easily, almost like cooking a soup bone. The time for this varies according to how dry the meat is on the skull. That's where presoaking the skull in water cuts down on the simmering time.
Once the skull is simmered long enough to where the meat can be peeled off easily, take it out and clean it under running water. Then follow the above steps for drying, bleaching, and finishing.
Skull Cleaning by Bag Method:
This method is not as popular as the other three, but it is effective nevertheless. It works best during the hot summer months. Skin the skull and remove the big chunks of meat. Place the skull in aplastic bag and close it up. Then just let it sit in the sun for a few weeks. Insects will find their way into the bag. And the heat inside
the bag will encourage bacteria growth.
Check the skull every few days. Once you can see the meat deteriorating and falling off, it is time to take the skull out.
Again, clean it under running water and make sure the brain is completely gone. If not, remove it with either a small wirehook or needlenose pliers, or if it is soft, just rinse it out.
Then follow the above mentioned steps for bleaching and finishing.
Horn Removal:
If you have horned skulls, as in sheep or antelope where the horn sheath needs to be removed, I suggest to soak the skull in a bucket of water like in the maceration method. The warmer the water, the sooner the bacteria will start to deteriorate the tissue around the horn core. This will release the horns.
Every few days check the skull and work the horns by twisting them. This can take from a couple of weeks in hot weather to over a year on some game like aoudads. Once they are ready to come off, they will twist off easily.
On some larger game like bighorn or audoad you may have to use a rubber mallet to release the horns from the core. Just gently hit all around the base of the horn and then twist it off. If it does notcome of easily or won't move, resoak for a few more days. After you remove the horns follow the above steps for finishing up the skull.
When you dry the skull before you bleach it, it helps to put the horns back on the core for a day to let them dry on the core. This seems to help to prevent shrinkage of the horns due to drying.Make sure you rinsed the horns out on the inside with clean water first though.
Once the skull is bleached and dried, the horns need to be reattached to the cores. Cut the cores off to about 2 inches from the skull. You do not need to leave the whole cores on the skull, just enough to slide the horns back over it.
Before you bondo or hot glue the horns onto the core, you may want to treat the inside of the core with an insecticide to prevent future infestation. I found nicotine poisioning to be very effective. Get some cheap regular pipe tobacco and boil it for a couple of hours. Then let that brew sit overnight. The next day strain it into a different container. Throw the large clumps away and keep the liquid. This is your poison. Pour some of it in each horn and then drain the excess back out of it. After that you are ready to reattach the horns to the core.
If the horn color has faded due to being soaked in the water for a long time, mist them lightly with WD40. This will bring out the original color of them without making them sticky or glossy.
CLEANING VELVET ANTLERED SKULLS
There are two main methods to do these kind of skulls: the soaking method, and removing the antlers method. But no matter which method you use, you need to take care of the velvet first.
If the velvet is fresh, I would suggest the injection method. You can use either formaldehyde, or any of the antler preservatives on the market which are safer than formaldehyde. For our example we use formaldehyde, but the method is the same. Before you inject the antlers, prick small holes into the tip of each tine using a small pin and then several holes at the base of the antlers. Then start to inject the formaldehyde into the tip of the antler. The formaldehyde will fill up the antlers and push out the blood at the base of the them. Once the solution coming out of the base of the antlers is clear, all blood has been removed from the antlers and you can stop injecting them.
If the velvet is already on the dry side, wrap it in rags which were soaked in the formaldehyde. Make sure the rags are dripping wet. Then wrap the antlers with plastic to keep the rags from drying out too fast. Leave that on for approximately three days. Unwrap the antlers and let them dry.
In the meantime, you need to take care of the skull as well. Go ahead and skin the skull out, either before or after treating the antlers. As with regular skulls, remove as much meat as possible. If you choose to remove the antlers, do it now. With a Sawz-All, or a meat saw, cut each antler off right below the burr. Then go ahead and treat the skull as you would any other, by either macerating it, simmering it, using beetles or the bagging method.
Once the skull is cleaned and bleached and all teeth glued in, reattach the antlers. With a drillbit, drill out a good size hole in each main beam from the bottom of the antler burr up, and the top of the skull where the antler will be reattached. Depending on the size of the antlers, make the holes deep enough so the antlers will be secure.
Insert a threaded rod into the antler and glue it in with either hotglue or an epoxie. Then insert the rod into the hole on the skull. It may have to be cut to fit right and bend to give the antters the right angle and curvature. After you have made your final adjustments on the rod glue it in place. Make sure the antler is all the way down to where it was cut off and no space remains. You may want to tape or fasten the antler so it won't move as the glue or epoxie sets up. Then do the same with the other antler.
Once the antlers are set and secure, you will have to do some finish work around the underside of the burrs where the cuts were made. With some off white apoxie (neutral works if you don't have off white), carefully fill in the small line that is left after reattaching the antlers.You will need very little apoxie as we are talking about a very small area here. Blend it into the bone. If needed afterwards, just lighty paint some off white on the area so the apoxie work can't be seen.
If you decide to leave the antlers on the skull, make sure once you soak the skull that the water does not go higher than the bottom of the antler burrs. You may want to wrap aluminum foil around the antler burrs, or slide a piece of cardboard under them to keep the water off of them. I would not suggest to simmer the skull as the steam from the water could damage the velvet on the antlers. Just soak the skull in water with some baking soda added. Try to keep the water fairly hot or at least warm to speed up the bacteria growth. It will take some time for the meat to deteriorate. But the damage to the skull is minimal or nonexistent.
Once the meat is easily removeable with your hands (always wear gloves) you can go ahead and finish out the skull as described above. Make sure when you bleach the skull that the peroxide does not touch the antlers. You can use a white towel soaked in the peroxide to wrap the top of the skull with. Finish the skull as you would any other skull.