
Well, it's not really a movie, but it is illustrated. A feller can spend the whole day writing explanations out, even then they may not make a lick of sense to any one but him, and maybe not even to him once the writing turns cold. So to spare us both grief, I'll do photos and captions to show and explain what to expect with STOP-ROT!
I chose this particular cape for the article for a reason, it was a mess. If I had used a blemish free, tight-haired cape and used the STOP-ROT as a preventive, it just wouldn't have the same effect as what you'll get to see in the photos where STOP-ROT is used around a slug hole.
Now follow these time frames. The cape was from a 210 pound field dressed whitetail deer buck, that was taken on a Monday and left hanging until the following Saturday. At that time the deer was skinned and the head was severed from the body. The head with skin attached was brought to me the next afternoon. I promptly skinned the head out and froze the cape. The cape was loosing quantities of hair at that time, but as of yet did not have any bare slip spots. I kept the cape in the freezer for a year.
After a year, I pulled the cape out of the freezer. The hair was flying off the cape as it thawed, so I started brushing the STOP-ROT on as an area thawed. The hair slipping stopped almost immediately.
If you are doing In-House Tanning all year round, this stuff could well save you a lot of grief, not to mention capes and skins!
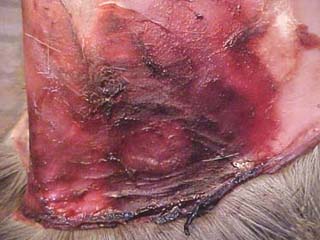
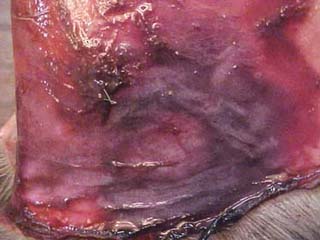
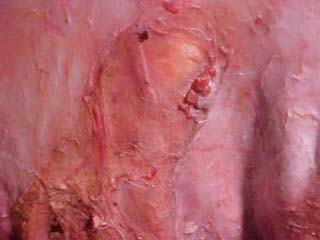
These first two photos illustrate how quickly STOP-ROT goes to work. The elapsed time from the first to the second photo is just over one minute!
Now check this out! Coagulated blood around the entry wound, kept wet with STOP-ROT, can be floated up and shaved or wiped away!
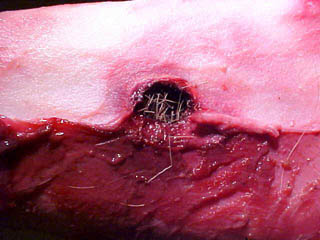
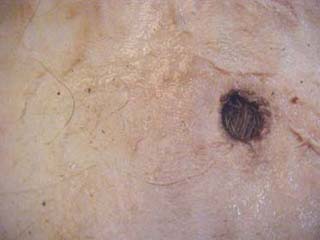
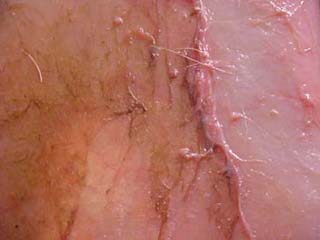
The next two photos show the progressive action of the STOP-ROT on the raw skin. Notice the yellow freezer burned section in the first photo.
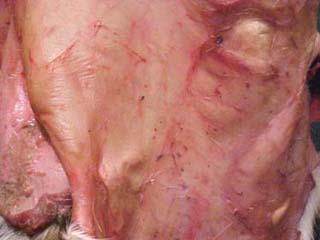
Now you can see what leaving the flesh side of the deer hide exposed to the air does. You can see the cut marks where I sliced the skin with a #22 scalpel blade.
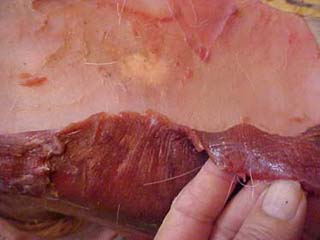
The STOP-ROT rehydrated meat is easy to remove. This is the face section of the cape, with meat left attached. The trailing section of the cape you see is what was treated with STOP-ROT and exposed to air. The face meat was also treated with STOP-ROT, and then after it was removed, another REAL thin application was made.
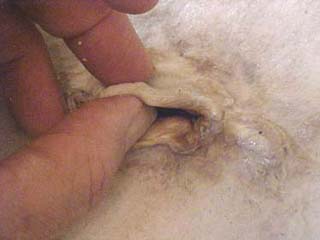
This is the turned ear. The skin was seriously bonded to the cartilage. The skin was so dried out, it allowed the STOP-ROT to penetrate from the hair side. You can see one teeny little stringy place the STOP-ROT didn't penetrate to.
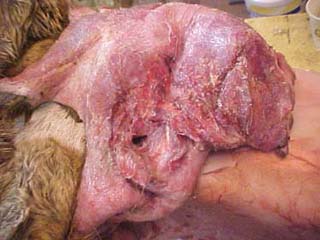
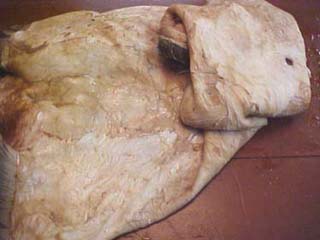
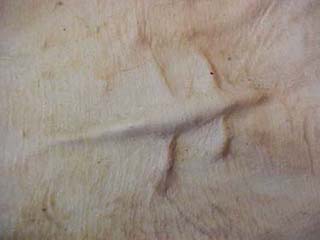
This section of the cape was left exposed to open air for 9 1/2 hours after the STOP-ROT treatment. With the slimy membrane disabled, it will dry or rehydrate much faster.
A different view of the cape after that much time of air exposure. You see our slug hole to the right. The cape has been pretty well fleshed at this point.
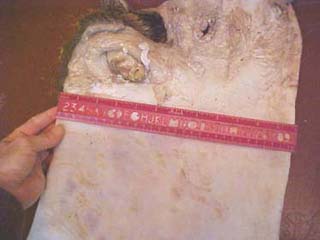
This is a foot ruler that you see here. The actual meat measurement was 22 1/2" at this point. Some of this stuff "reads" more complicated than what it actually is in real life, with that in mind, this is what had been done to get the cape to this point.
You have already read the progression and application, after that, the cape was rehydrated in a solution of 3 gallons of water with 3 pounds of salt AND enough WTDS Leatherizing Acid was added to take the pH down below 6 (any where between 5.5-6 is good). It was left in long enough to rehydrate to the point of being soft.
The salt and acid soultion does a serious job of cleaning up both skin and hair on a cape or skin. This soak time will vary from cape to cape and skin to skin, it could be 20 minutes or 5 hours, and any thing in between. After that, it was salted and rolled up and set up in such a fashion as to allow fluids to drain away. It was then put in the acid/saline solution (pickle) the following day.
The cape had now been "pickled", and "neutralized", more like actually buffered,
in the traditional baking soda and water solution and "bagged" in corn cob grit.
This cape already displays the working qualities I want. I want to be able to shape
that skin any which direction I want it, and I do not, and will not, use a bunch of
brads, or pins, to hold it in place when mounted. If I use dextrin based hide paste
over the entire mannikin, then I will pin the eye corners and pre-orbitals. With a
good hide paste, I don't even have to pin those areas.
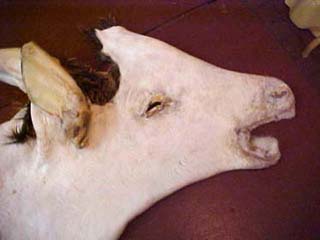
I have to add this picture here, because this is something I do not like seeing. If you have tanned many deer hides yourself, you 've probably seen it too.
This eye lid is retaining too much acid solution. When you see this much plumping or swelling of eye lids in a "pickle" bucket, you can about bet that particular animal's whole skin is also retaining too much acid, and it will be hard to neutralize or buffer.
You can finish and mount something like this, but it obvious that you would have a lot of shrinking around the eyes once the mount is dry. Around the eyes, 1/8 of an inch can be a bunch. Simple solution, sprinkle the whole cape down with a fine grain salt, allow the salt to draw and drain the acid, and then put the cape in tap water until it is softened back up, shouldn't take a whole lot of minutes. Then put the cape in your baking soda water solution for neutralizing.*
*Since this article was originally written, and published, there has been some new developements. If STOP-ROT is brushed on to both the flesh side and hair side of the eyelids before neutralizing, or buffering, losing epidermis around the eyes is less likely to take place.
This cape was finished out with the balance of the Whitetail Designer System, and is now ready to mount.
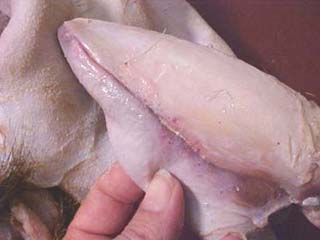
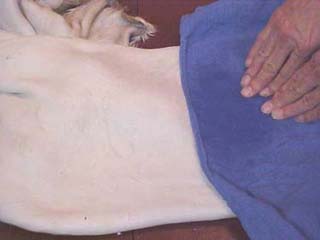
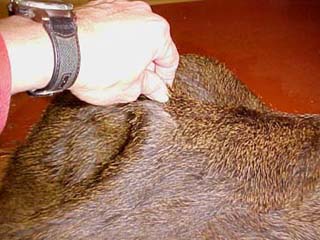
In the below photo, I am lifting up the wet cape by the hair. Not a wise thing to do even under normal circumstances, but it helps to illustrate the end results.
Check out the way the STOP-ROT has softened the freezer burn and at the same time dried the slimy membrane.
Pieces of meat are easily removed.
I pinched-up this cute little lizard to demonstrate. I know it looks more like a salamander, but I was working with out a reference photo.
STOP-ROT THE MOVIE
or what you can expect to see with mammal skin.
by Glen Conley
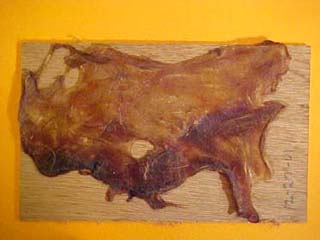
The picture below is that of a piece of meat that had been left on the cape in the article. STOP-ROT had been brushed over it prior to fleshing. I just laid the piece of meat on the panel and dated it. I was wanting to see how effective the STOP-ROT by it's self would be over a period of time. The picture originally appeared on the Taxidermy Reference website. The panel is dated 12-27-01.
I still have the piece of meat, and it still looks the same as of 1-17-05.
STOP-ROT is available from these taxidermy supply distributors and tanneries: Order on-line from high lighted suppliers!
RESEARCH MANNIKINS 1-800-826-0654
Van Dyke's Taxidermy Supply 1-800-843-3320
Wildlife Artist Supply Company 1-800-334-8012
Quality Taxidermy Supply 1-888-527-8722
AEWS Taxidermy Supplies 1-800-529-3470
Taxidermy Arts Supply TASCO
Lonestar Wool & Fur 1-919-989-2000
SIVKO FUR, INC. 1-607-698-4827
James Taxidermy Supply (formerly Kings)
1-662-286-5133
WHITETAIL DESIGNER SYSTEMS 1-866-849-9198