I developed this method to make fast, easy and cheap ledges and rocks. I sell a lot of mammals on ebay and they sell much quicker and for higher prices with habitat included. I am sure I have pirated some ideas but I have never seen any of these ideas in print or on video. If I have inadvertantly taken one of your ideas I’ll apologze right now. To me, as I developed this, it was all unique. Let’s get started……………..
Figure 1) You need:
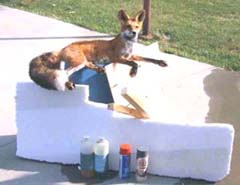
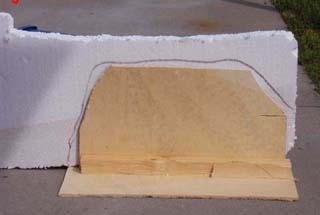
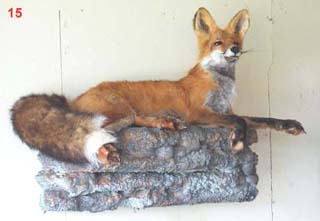
an animal (red fox shown here)
¼ “ plywood – can be junk grade but need to be real wood not panelling
2x2 scraps
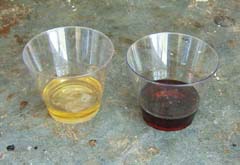
caulking (used for glue)
spray paint (orange and black in this example)
spray rock (available from wal mart (color is manhattan mist))
dry wall screws – 3”
2 part polyurethane foam
2” insulation (get from lumber yard – comes in 2 x 8 sheets)
Figure 2) Depending on the weight of the animal (in this case fox) you may need a slab of wood under top "ledge piece”. This fox’s weight was marginal but for example’s sake I used it. We will cut 3 pieces of wood to start. One for backdrop – one for bracing ledge to sit on (2 x 2) and one for support ledge. As you are building your ledge you have to think two or three steps ahead so you don’t cover up something and have to tear it apart and start over. I laid the fox on my workbench and figured out the measurements before I started. I have done a number ( a big number) of these ledges so I normally get it pretty close on the first try. If you screw up it is a simple matter to start over from scratch because your cost is low. Here are the 3 pieces cut and we are ready to get started.
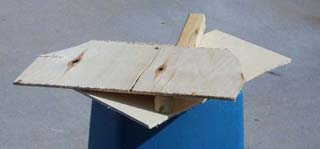
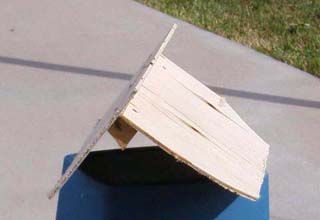
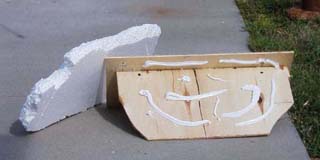
Figure3) I have screwed the parts together in this picture. The 2 x 2 support doesn’t show well in this picture but it is screwed to the backboard. Everything is leveled as it is going together. No rocket science yet!
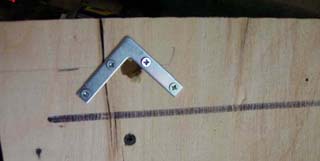
Figures 4 & 5) I have positioned hanging holes so they will hidden behind ledge material. I prefer to put corner brackets over the holes. This gives the hanging screw something to grap on to in case someone ( or something) graps onto front of mount. I used to just drill holes but I have found this way to be better.
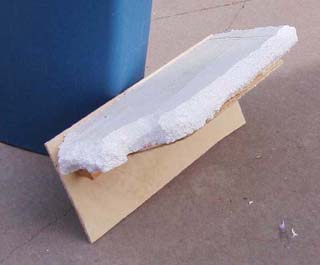
Figure 6) We want the first piece of ledge to hide our support ledge. Cut the styrofoam slighlty larger than an exact fit. I use a rapala filet knife to cut the styrofoam. When cutting the styrofoam close is close enough.
Figure 7) We have now cut our first piece of foam. I always scallop and taper the 90 degreee edges to give a rock look. Cut chunks out and really play with the look of the ‘stone’. You can’t do anything wrong here. In this picture I have applied my caulking (glue) and am ready to attach.
Figure 8) Our first piece of ‘rock’ is now attached. I also use a 3” dry wall screw to attach to wood. These screws only give very minimal strength. That is all that is really needed. The insulation is truly as light as a feather.
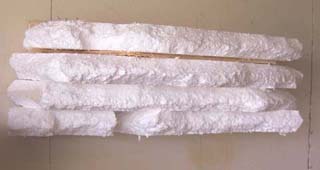
Figure 9) I have continued to put piece after piece until the basic ledge is finished. Make sure and caulk and put in screws between sheets. Our support ledge is still showing but it will disappear soon enough.
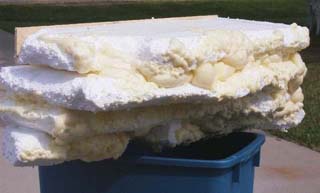
Figure 10) Mix up a small amount of 2 part foam. You may have to mix up a second batch so make this first batch small. If you are working where it is hot it will take off like a rocket and your batch make kick before you can get it all applied, start small.
Figure 11) Paint the foam (use throw away brush) into cracks and anywhere else you feel it may be needed. If you have pieced the styrofoam the 2 part foam will act as a very strong glue. The foam kills all the manmade look in an instant. If you miss a spot or it looks like you need some more mix up another small batch and paint it on. You cant do anything wrong here.
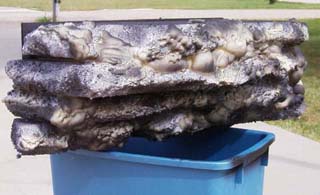
Figure 12) Tone everything down with a LIGHT coat of black. You are not trying to blacken everything just knock the white color out. You can also use gray as the ‘tone downer’ (new taxidermist word).
Figure 13) Figure out what you want your underlying color to be. I am partial to the sandstone color look so I use brite orange and put a medium coat of orange over the black and on the high points of the polyurethane. Spray some areas heavy and some light. Skip places too. Have fun with this.
Figure14) Get out your spray rock and put it on. Again some areas light and some heavy. Let some of the underlying color show thru. You can’t do it wrong!! After drying seal the spray rock with spray on lacquer. If it is cool it takes a long time for the spray rock to dry.
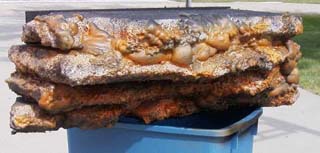
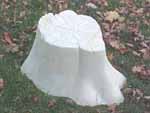
Figure 15) VOILA!!!!
Try this simple and easy method. Taking pictures and thinking what to say took longer than just making the habitat. One nice thing about this method is there is NO LEARNING CURVE. The first one you make will be great. Get going…….
Terry Davis
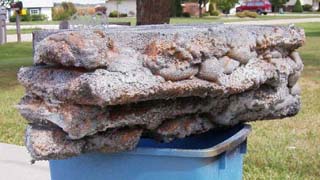
Here's one more picture that shows a different ledge.
Figure 1
Figure 2
Figure 3
Figures 4 & 5
Figure 6
Figure 7
Figure 8
Figure 9
Figure 10
Figure 11
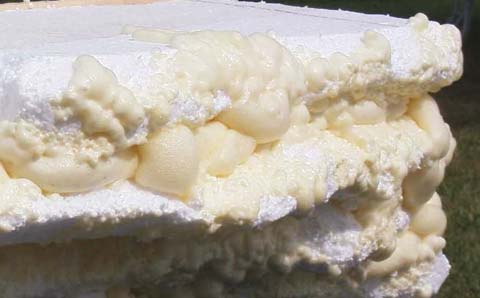
Here's a close-up photo of the foamed together upper right corner of the ledge.
The above website provides the means whereby taxidermists can donate money, mounts, materials, or anything of value that can be resold . The money generated will be added to the TERF for use now, and far into the future. Monies generated will be managed by The National Taxidermists Association. The NTA plans to continue this fund, and it will be available for years to come. There is an immediate need for help for our hurricane victims.