My original intentions with this page was to set up a few photos of the commonplace, but use the combination of microscope, digital camera, and our computer monitors to enlarge things to the point that they just didn't look the same as they did with the naked eye. I thought if I did the "familiar", you would get a better idea as to how much magnification we're working with, and that would give you a better perspective on sizes, at cellular level and down, for current, and future microphotography articles.
It might be a bad guess on my part, but I figured that many of you had probably done the drop of pond water, under the microscope, somewhere along the line in going through school. If not, you had at least read about the amount of life that can be found in a DROP of water. So I put a couple of gallons of treated tap water in a bucket, and then set it under a mulberry bush, and let nature take it's course.
The bucket of water turns good and green with suspended algae, like green to the point the hand disappeared from sight before it got to the bottom of a two and a half gallon bucket. I'm thinking that this is going to be absolutely teeming with protozoans, and this will be perfect.
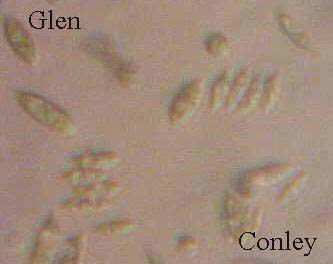
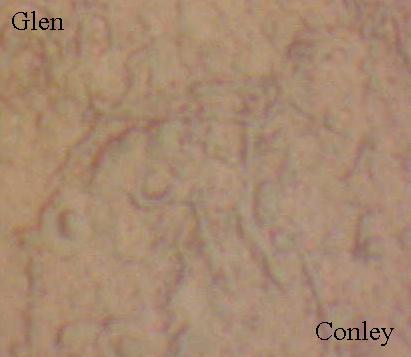
I put a drop of water on the microscope slide, and started looking for protozoans amongst the algae. Didn't find any. I thought that strange. So I just took a couple of photos of the unicellular algaes, one of which you see here. They're probably going to appear a little bigger than what they did back when you were in school.
Allow me to entertain you while the rest of these photos are downloading.
The microscope I use was made back in the mid 1950s. I bought it from the orignal owner. When he had purchased the microscope and various oculars originally, a small farm could have been bought around here for the same amount of money. The lens quality is superb. With the naked eye, images can be crystal clear.
The camera that I use is the same digital that I use for my taxidermy reference photos. It's a pretty respectable digital.
I searched all over the country by internet and telephone trying to find a 35 mm SLR camera to microscope adapter, which was made back in the same time frame. No luck.
One day I was fooling around and focused the digital on the ocular lens of the microscope, and ALMOST had an image showing through.
It didn't take me much time, and I whipped up an adapter, which you see here.
The adapter is pretty high tech. It is made from an index card, piece of duct tape, and a piece of old pants leg. Who woulda thunked, huh? Now I do lose a lot of clarity with this rig, but that is because of the amount of light required to print an image on the film. I use a 100 watt clear incandescent bulb, just inches away from the microscope mirror. When I look in through the ocular with it set up like this, it's almost like looking into the sun. I have to do a juggling routine of focusing the microscope and the camera at the same time, and then using the LCD image to photograph by. I also lose a fair amount of color in some cases like this. I have tried a black and white setting on the camera, but seem to lose too much contrast like that.
Back to our water drop. I took my syringe down to the bottom of the bucket, and pulled up about a 1/2 cc. I put about three small drops on a flat slide. I 'm trying to get things in focus and find this rotifer, anchored to a diatom like a ball and chain. I'm thinking that will be cool, I 'll get it's picture. I 'm trying to get a good focus when a protozoan comes within it's reach. SNARF! GONE! WHOA! NEAT! I've got to get this feeding sequence on film!
Easier thought than done. I'm tellin' ya, they're quick when they do that catch and swallow thing. I have no idea as to how many protozoans a rotifer can eat at a sitting, but it must be a bunch. I took twenty-six photos in fourteen minutes, with many of those being blurred by the swallowing motion of the rotifer. As the water was evaporating on the slide, the protozoans were being herded in closer to the rotifer.
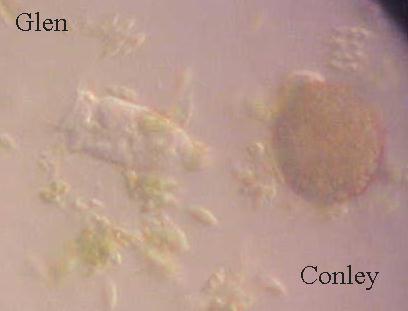
The algae cells that you see are of the same type as in the first photo. The protozoans are of a similar shape, as the algae cells, but a tad smaller. It is hard to differentiate them from the algaes in most of these photos, they have too much color coming through their transparencies. To the naked eye (with the aid of the microscope) they would appear crystalline. I could not get the whole depth of this field, rotifer, algae, protozoans, and diatom in focus in unison, so I had to opt for the best I could with the rotifer.
In this first photo, the rotifer is in "Ambush Mode". It had this "tense" look, and would wait for a protozoan to come near.
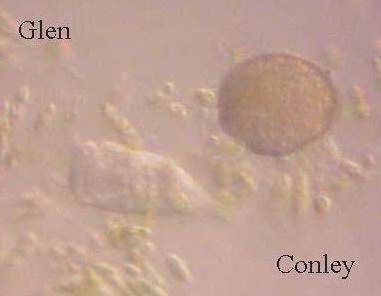
It has just caught, and "partially" swallowed a protozoan in this photo.
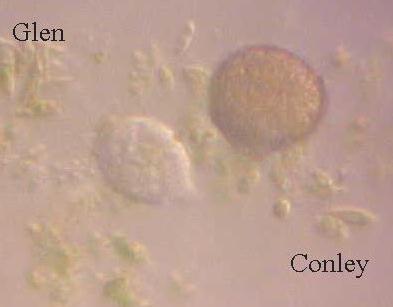
It has turned into a ball shape here, that is the end of the swallowing sequence. Once a protozoan came within range, an inhale like action appeared to be taking place, quite like when a larger fish "inhales" a smaller fish. From this inhale action, to the round protozoan swallowed stage, it only took a split second. it was so fast, I almost could not catch it with the eye. I was only second guessing as to when it would inhale a protozoan to get the swallowing sequence. Like I said, I photographed a lot of blurs.
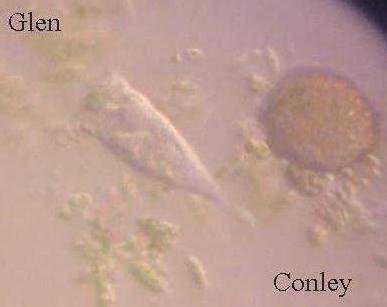
Immediately after feeding, it would have this relaxed look like you see here. To the left of it's "head" is probably the most clearly defined protozoan in this sequence.
You can almost start to make out the cilia around the mouth in this photo.
I was really surprised as to how mobile the rotifer could be with it's diatom ball and chain.
After giving me that neat series of photos, I just couldn't go washing the little guy down the drain. I felt that it should be treated with the same respect as a service animal, and retired it back to the bucket. That should give you a feeling of relief, knowing that I practiced Catch, Photo, and Release.
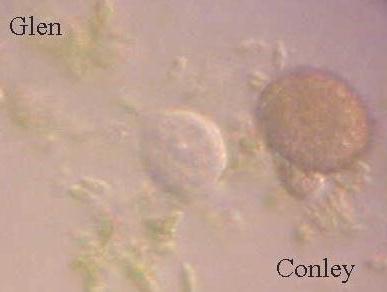
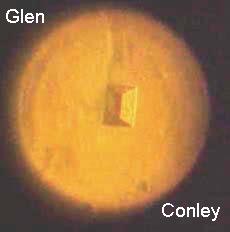
Now here's something you have no doubt seen on a number of occasions. Recognize it by the photos?
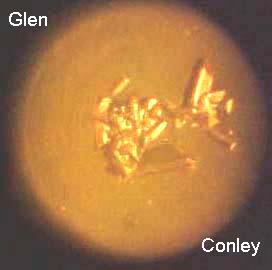
Here's your hints. The crystal on the left is a calcium oxalate crystal, the ones on the right are ammonium magnesium phosphate and they are in a liquid.
Just what you thought, huh? O. K., so what's the liquid?
Dog pee. I know, I know, who would 've thunked?
I don't even want to try and guess as to how many times these crystals have been magnified.
Formed crystals can be a good identification for the end results of reactions, or as an identifier of the chemicals involved to make the end product. In the case of urine crystals and casts, the abundance of, or lack of common structures can help to point to a malfunction, or proper function.in the living system.
At this point you're probably thinking, "Glen, how do you know all this stuff?". I don't. Only the ones that I will see and deal with, with frequency, and even then, I'm only interested in the ones that will help provide the clues for answers to the questions I will have regarding what I'm working on at the time. In other words, I have to sort things out. A person has a couple of options to come up with identities of crystals, either react known compounds to see if the crystal can be produced, or do the same thing your vet, nurse, or lab tech is going to do, reference with a book. I have a single urine analysis book that does help with identification of some crystals, and "end result" compounds. I have a real simple philosophy, do whatever it is that I want to do, THEN use, or read the book. That philosophy is not be confused with: If in doubt, read the instructions. Some things don't come with instructions.
Let's take the calcium oxalate crystal in the dog urine.
First off, this urine was fresh from the dog. Evaporations will change the picture (literally) real quick, with liquids and gases evaporated off, the slide will basically look like fir, which will look something like a frost covered window pane. Distinctions are lost from view.
A given amount of calcium oxalate, as a result of dietary intake of plant oxalates would be considered normal, for the dog, or human. An abundance of calcium oxalate would indicate a diet that is high in vegetable matter containing oxalates, or pathological conditions that could lead to death, in dog or human, if left untreated. So you can see how the crystals can be a quick indicator as to what to look for next.
Calcium carbonate. You probably recognize the name. Calcium carbonate ("dissolved rock"), is the primary mineral constituent of MOST hard water conditions.
Calcium oxalate crystals can also be formed, and precipitated with oxalic acid in hard water. Small world, isn't it? That is the end result of the reaction between the two. By the same token, calcium carbonate and hydrochloric acid will produce calcium chloride, calcium carbonate and citric acid produces calcium citrate, you can take it from there. If you have ever wondered where the sandy, gritty stuff comes from in the bottom of your acid pickle barrel, wonder but little more, that will account for a lot of it.
We frequently use sodium bicarbonate, as baking soda, to neutralize our acid pickles. Keeping the same train of thought, we are substituting the sodium for the calcium as our mineral, and reacting with the acids to produce sodium oxalate as the end result of oxalic acid and baking soda, hydrochloric acid and baking soda yields sodium chloride, which we know as plain old salt, baking soda and citric acid yields sodium citrate.
You should be able to easily understand as to why hard water will be harder to hold a pH with initially. The acids are being "used up" to a degree as a result of neutralization.
DISCLAIMER.
I personally would not use any of the acids I used as examples here for hair on tanning purposes. I used them as "generic" examples to illustrate the point.
You know how like when you have a cape, or skin, in the pickle, and salt and mineral crystals will form on the hair where the solution has been wicked up the hair, and water evaporates off leaving the crystal?
In 2001 I was getting ready to work on a green deer cape, and I noticed an abundance of small crystals formed on the tips of the hairs. I just darn near just passed it off, when all of a sudden that "Now waitaminnit, this ain't right" thought flashed through my mind. I set up a slide and took a look. Identifying the structures as chlorite scales was the easy part.
I'm all excited about the find, and started calling people up on the phone, thinking that some of these guys will already know about the decompositions that could produce this, and I'll get an easy answer. I can be so dumb.
No one would even "touch it", except for one of our state deer biologist. He shared in my excitement, and told me that he was getting ready to start a research project and would be in the state's library on a regular basis for awhile. He told me the answer has got to be in there. A few weeks later he calls me up, and says, "You're right there's nothing on the physiology of whitetails out there."
I have repeatedly came up with another distinct crystal when working with whitetail deer skin, the identity of which has defied me, and that has been over a number of years. My gut feeling is that IF I can "crack" these two, there is going to be some kind of major answer there. What that answer will mean, I have no idea, they may be simply a stepping stone to something else, OR they will be profound answers themselves.
**************************************
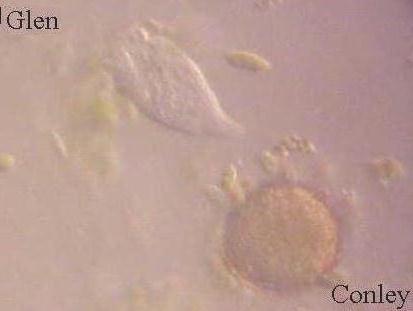
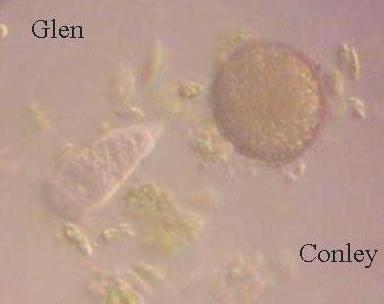
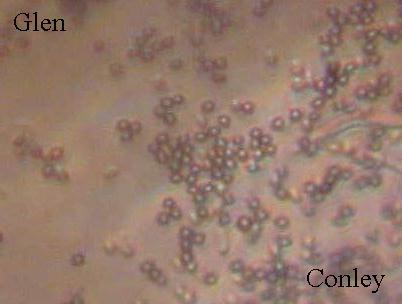
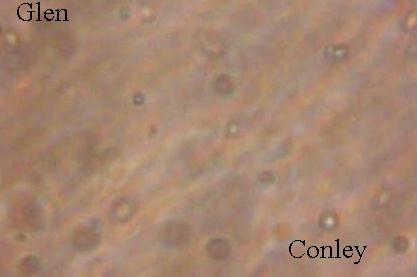
Here's a couple more from the pickle bucket. When you neutralize your acid pickle, and let it sit around for awhile it has a tendency to grow mold on the surface. Remember, we're still working on size perspectives with this equipment. These next two photos are of the mold SPORES! I took samples from two different colonies, but I imagine there's more than two genus and species represented here. Mold spores are pretty itty bitty.
Something I thought might be of interest to you bird taxidermists, I had recently read that decompositions caused by yeast were a greater concern to the poultry industry than bacteria was. Me being the kind of person I am, I boogie to the grocery store and buy a "specimen". The back was saved for research, and the rest of it was eaten. The back was wrapped in Saran Wrap and placed in the refrigerator. Monitoring by visually checking, and then checking by smelling, it took 9 days for it to start to turn into a real funky chicken.
What you see below is unstained yeast from the chicken specimen on day 10.
With the exception of the yeast photo, which was taken at 250x, the rest of the photos were taken at 100-150x at the microscope. These magnifications at the scope, with this rig I currently have set up, are about as high as I can go, and still get an image to photograph.
The microscope has 2,425x capabilities. If I could just figure out a way to photograph through the whole range of magnifications......................